Hugin tutorial — Blend masks
This tutorial covers an advanced use of Hugin — Using masks to control the blending of images within the overlap region.
Note: This tutorial is based on the 2010.2 version of Hugin. If you have a later version of Hugin which supports blend masks,
some of the detail may differ, but the underlying principle will remain
the
same.
Background
There are times when the blending of photos gives an undesirable result, such that the blend region shows artifacts that would not be seen if an area from another overlapping photo had been used instead.The problem is often noticeable when the photos contain people. A person may be walking and appear multiple times in a series of photos, or appear only in part in the stitch.
Blend masking allows you to define an Include region which the blender will try to incorporate into the final stitch, or to define an Exclude region which the blender will try to keep out of the stitch.
The Mask tab in the main Hugin window allows you to select the image in which you want to define a mask; define the mask as a closed polygon by selecting points with the mouse; change a mask from exclude to include region, and Save, Load or Delete a mask.
Blend masks are not like your normal 'cut out' and 'paste in' masking. They are more like giving hints to the blender, so it isn't always necessary to carefully define a mask exactly on the boundary of an object. Often it sufficient to only roughly enclose the object to be included or excluded.
You can download the photos used in this tutorial to try it
yourself. p1020257.jpg p1020258.jpg
These photos have been reduced in size to those used during the
preparation of the tutorial, but should allow you to test the procedures and get the same, or
very similar
results.
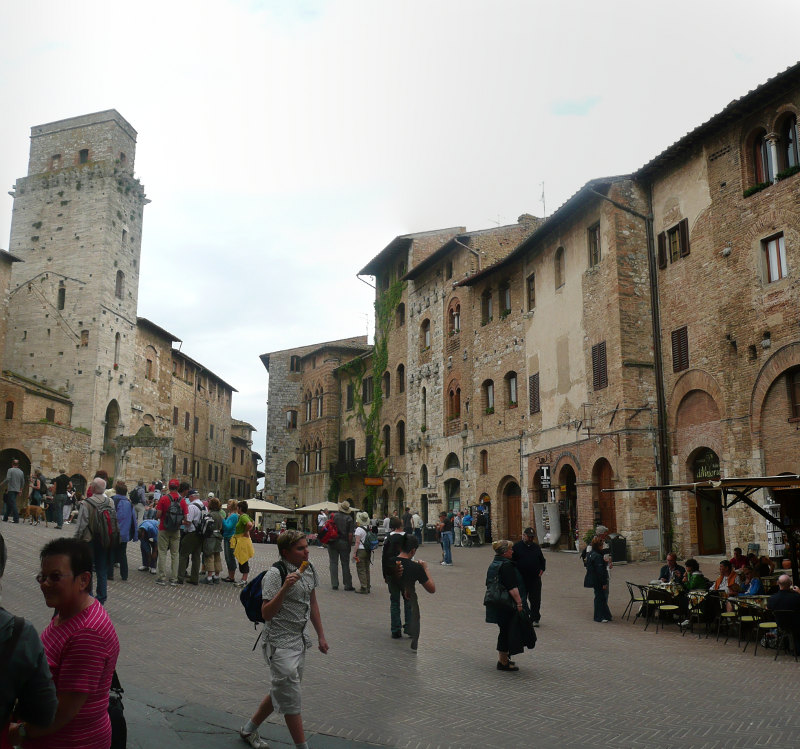
The image below is the result of stitching the two photos, using hugin
defaults. The photos contain moving people and the stitch shows that some of the people (lower-centre) are
only
partly displayed.
We will try an exclude mask then an include mask, to obtain a
better result.
Using an Exclude mask
Start by launching Hugin, use the Assistant - 1. Load images... button to select the images, then use the Assistant - 2. Align... button to optimise the alignment, then display a preview of the stitch in the Fast Preview window.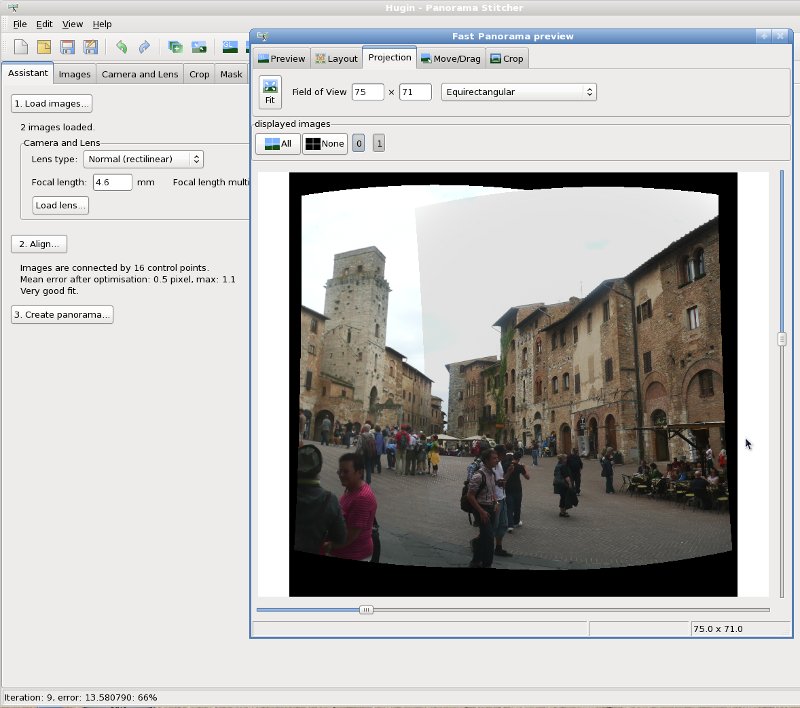
To locate suitable areas of the images that could be masked to fix the problem, open the Fast Preview window, click on the Identify button, then move your mouse over the images in the window, or over the image number buttons. The images will be highlighted as shown below. Moving the mouse pointer back and forth will help locate areas that could be masked. Identify will also show masks when they have been defined or loaded.
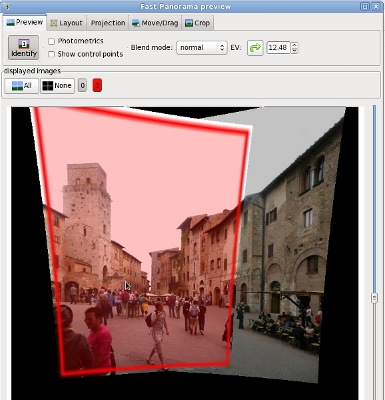
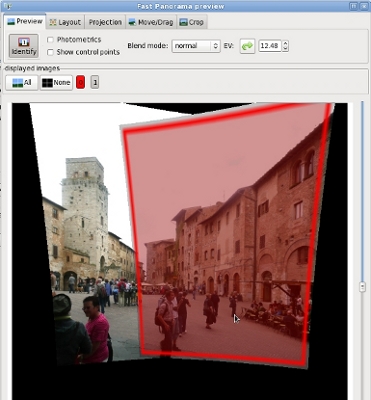
You can also switch individual images on and off in the Fast Preview window (toggle the image number buttons 0, 1... in the displayed images toolbar) to see which parts of the overlapped regions could be excluded to improve the final stitch.
You will need to compare each image with the result from the initial stitch to decide which parts of either image should be masked to get a better result.
Note that when we are looking to exclude part of an image, there needs to be a suitable part in the same area of the overlapped image. The blender must have something to replace the excluded area. If the excluded area falls outside the overlap area the final stitch will include a hole.
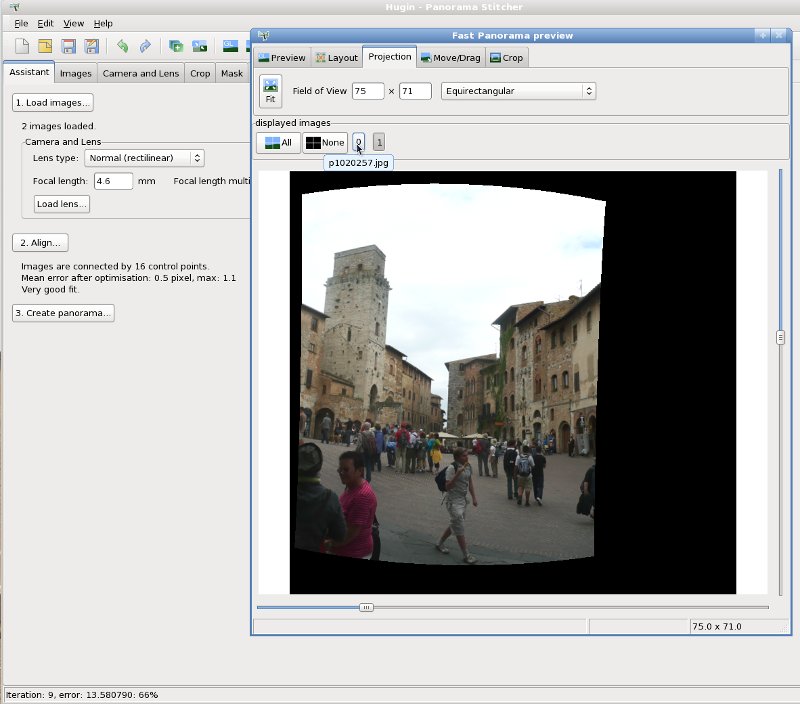
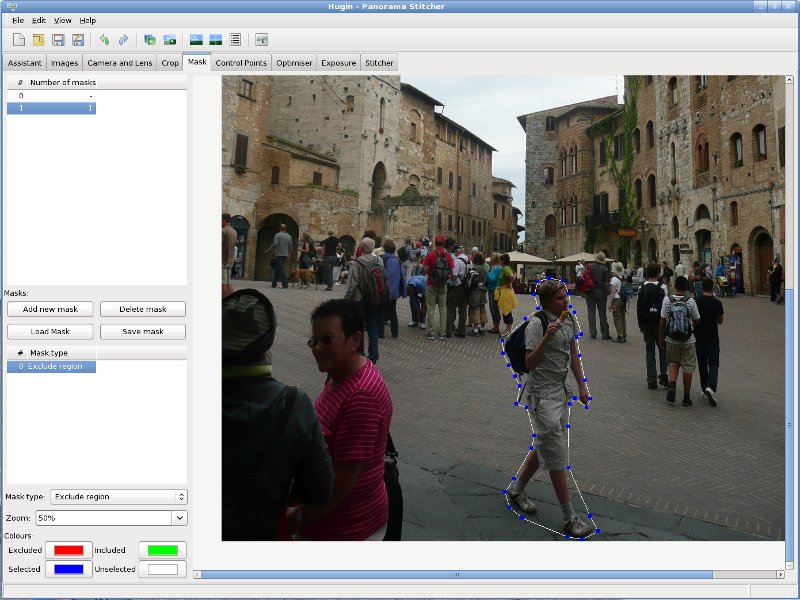
We may have some success if we could exclude the young gentleman in the lower centre foreground of photo #1.
Select the Mask tab in the main Hugin window, then select the image which contains the area to be excluded. Go to the Zoom: button to make the image a suitable a size to make it easy to select mask boundary points.
Select Add new mask, then simply begin to define the mask boundary by selecting points with the left mouse. Double click left mouse to end and close the polygon to the first point.
To edit your mask see Mask editor key bindings later in this tutorial.
You can download the masks, mask1, mask2. You may have to select the scale and/or rotate options when using Load mask, to get the masks to align with the scaled images. Having loaded a mask, you will need to select the appropriate image and then select the mask to see the mask applied to the image.
This is the result of blend and stitch using the exclude mask.
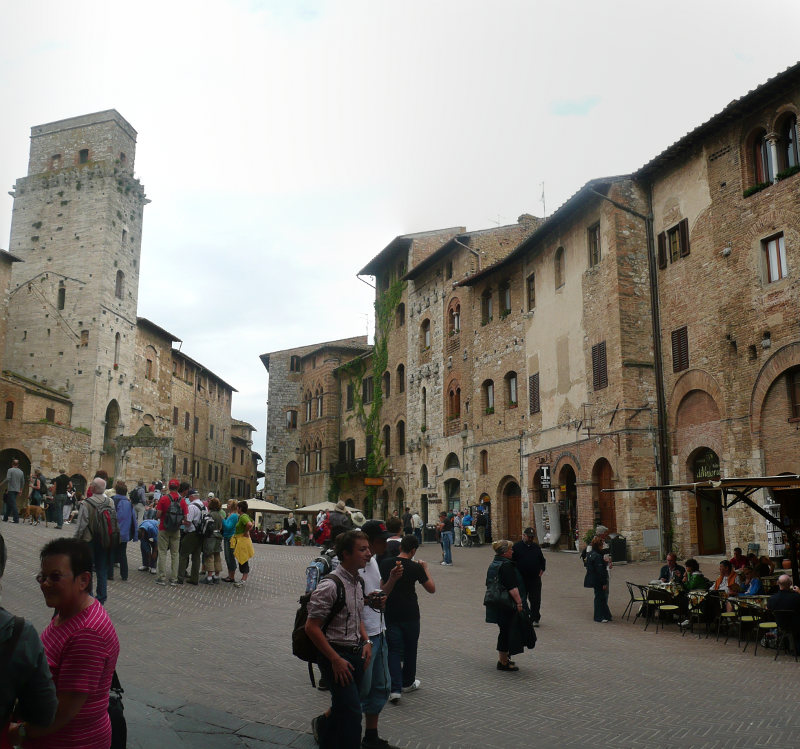
We will Save mask as it comes in handy again later, then Delete mask so that we can see how an Include mask works.
Using an Include mask
Here we created an include mask on photo #0, and this is roughly defined as shown in the image below.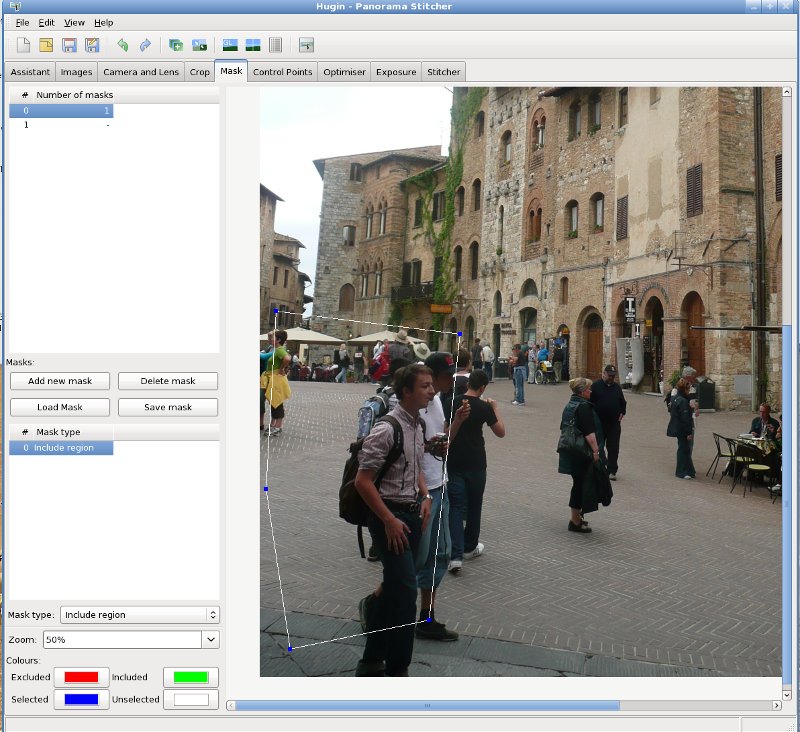
and the result of stitching and blending...

which is almost identical to the result achieved using the more detailed exclude mask.
Again we Save mask before trying the next section.
A closer look at how the blender works
To get a better idea of how the blender works, we will colorize our two images using Gimp, setting one to cyan and the other to red. If we set the blender to use a narrow seam and no seam optimisation, we can see how the blender handles the problem with no mask; an exclude mask, and an include mask.Having loaded our two colorized photos, we can go to the Stitcher tab and set the enblend Options to --no-optimize -l 4 to see how the blender stitches without a mask.
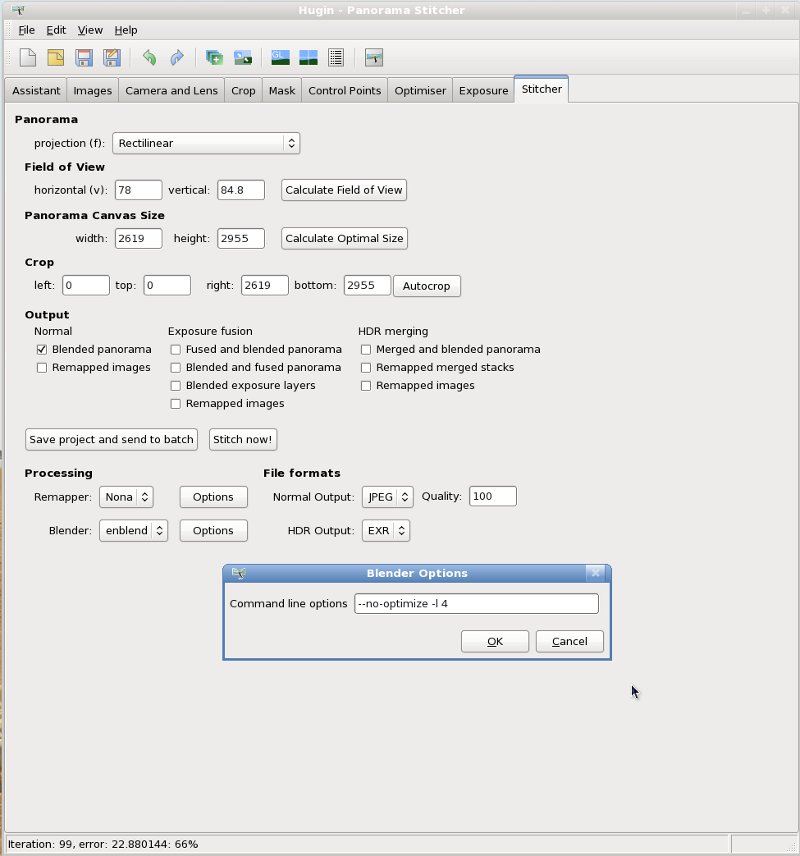
Go to the Mask tab and ensure that no masks are defined. If masks are still defined, select each in turn and Delete mask.
The resulting blend and stitch shows us the seam line.
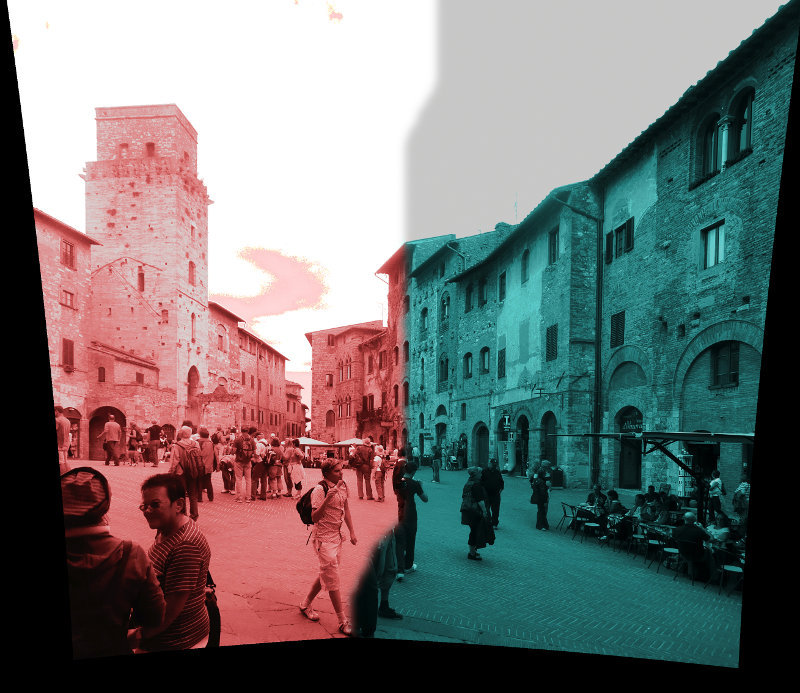
Note that the blend seam will be different to that of our original stitch without a mask, because in that case we used the Enblend defaults.
If we now select the Mask tab and Load Mask to retrieve our exclude mask, then stitch from the Stitcher tab so that we use our Enblend options, we see that the blend seam has changed.
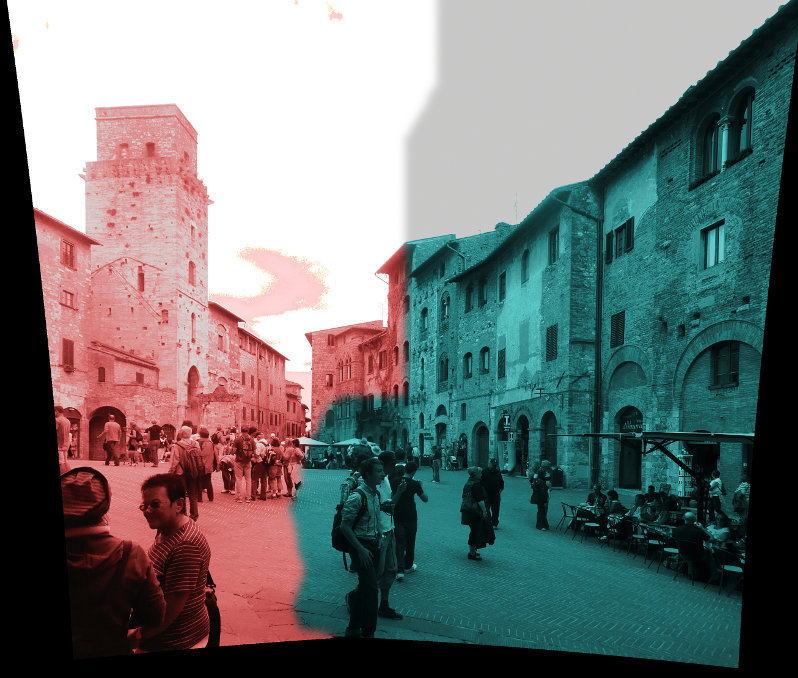
Note how the seam of the blend hasn't exactly followed the mask boundary. The location of the seam line has been guided by the mask boundary.
If we now go back to the Mask tab, select Delete mask, then select Load Mask to load in our include mask, and again stitch from the Stitcher tab, the result is...
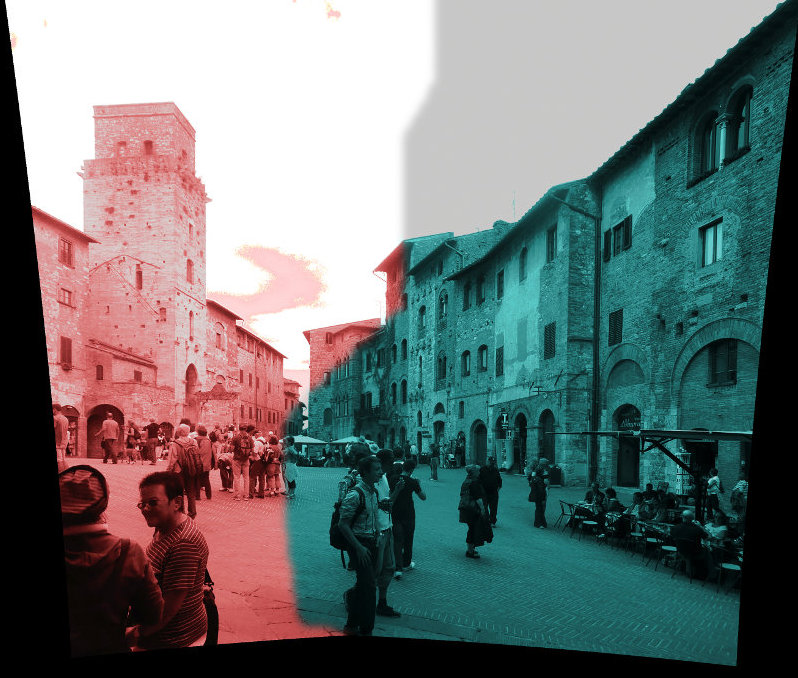
Again the seam has been guided by the mask boundary.
The important thing to remember is that the masks must be defined within the photo overlap region, otherwise a hole will appear in the stitched image.
Masking is quite easy to use once you are familiar with the basics, so try things and experiment.
Mask editor key bindings
Creating mask polygon: Left mouse button sets one point, finish with right mouse button or left click twice.Select mask: Left mouse click inside polygon or use rubberband, works only when there are no points selected; or use the listbox (i.e. select 0 Exclude region as in example image above where we created our exclude mask).
Selecting point(s): After selecting Add new mask left mouse click on point or use rubberband; when holding shift the new points are added to an existing selection.
Move point(s): drag with left mouse button.
Move whole mask: drag with right mouse button.
Adding points: Left click while holding ctrl key on a line segment.
Deleting points: Right mouse click while holding ctrl key on a point or drag with right mouse button and pressed ctrl key a rubber band around points (the remaining polygon must consist of at least three points, otherwise the deleting is cancelled); the delete key deletes the selected points.
Deleting mask: Use Delete mask button. The mask is also deleted by pressing the delete key when all or no points of the current mask are selected.
Other Tips and Tricks
Here are three of Bruno's workflows that use masks;- Masking out objects that always appear. Usually this is my feet, but tripod photographers will always have the same tripod that can be masked with a save/load mask technique.
- Removing my shadow and covering the sun. I can't have the sun in shot without getting lens-flares, so I cover the sun with my hand, I take the shot twice, once with my left hand and once with my right, the result is a little hole that is easy to patch. I do the same with my shadow, shooting it twice, masking, and it vanishes from the panorama.
- Crowd scenes. What I now do is mask everybody with an
exclude mask, look at the preview and then flip masks one by one into
'include' until all the holes are filled
Other useful information
To learn more about Enblend, the Hugin blender, go to the Hugin Help. You should be able to navigate to the Enblend reference manual which will explain all the options that can be used to fine tune the image blending.Related links
Bruno Postle has posted a tutorial.
Cristian Marchi has posted a nice tutorial
showing the use of include (or 'positive') masking.
This tutorial by Terry Duell and Bruno
Postle, Aug. 2010.
