Hugin tutorial — Stitching murals using mosaic mode
This tutorial covers another non-panoramic usage of Hugin — Taking two or more partial images of a mural on a flat surface, and stitching them seamlessly into a single final image.
Note: This tutorial is based on the 2010.2.0 version of Hugin, although your version may differ, the underlying principle will remain the same.Normal panoramas are stitched from a number of photos taken from the same location such that the nodal point of the lens stays stationary and the camera is rotated in pitch, yaw or roll in order to capture the set of overlapping images necessary for the panorama. This approach minimises parallax errors, and all the photos are then aligned into a panorama on the surface of a sphere by optimising (minimising the errors) of the yaw, pitch and roll angles.
Mosaic mode allows you to shoot photos of any flat, or plane surface such as a mural, from multiple positions and angles, and then stitch the photos together into a seamless view of the mural. One advantage of this mode is that as the camera location is unrestricted, parallax can be used to expose parts of the mural in one photo that may be obscured in another, and in the final stitch any objects in front of the mural may be masked out.
In mosaic mode we are interested in the scene on the flat surface, and as there is no parallax involved with elements of a flat scene we can allow the camera to move. The alignment of the photos is done by optimising translations in the X,Y and Z directions. X is left/right, Y is up/down and Z is into/out of the image.
Here is a contrived example to demonstrate the basics of stitching in mosaic mode.
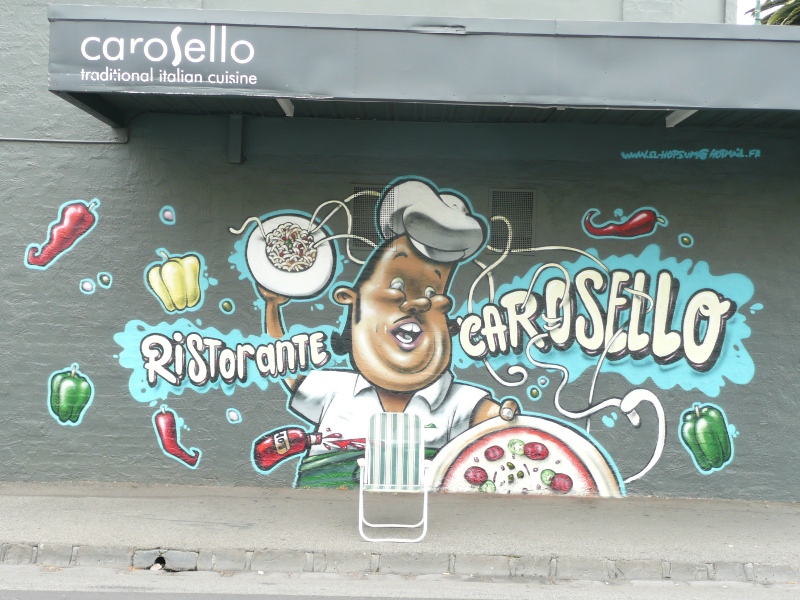
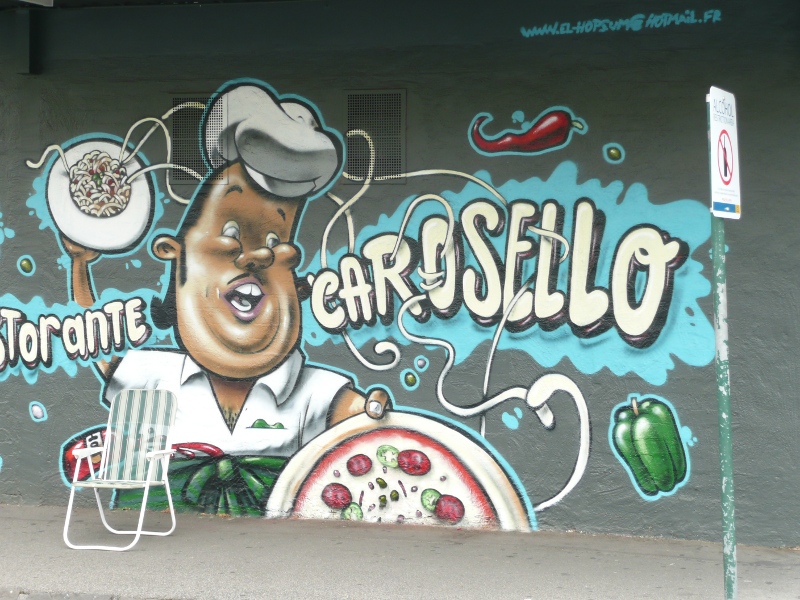
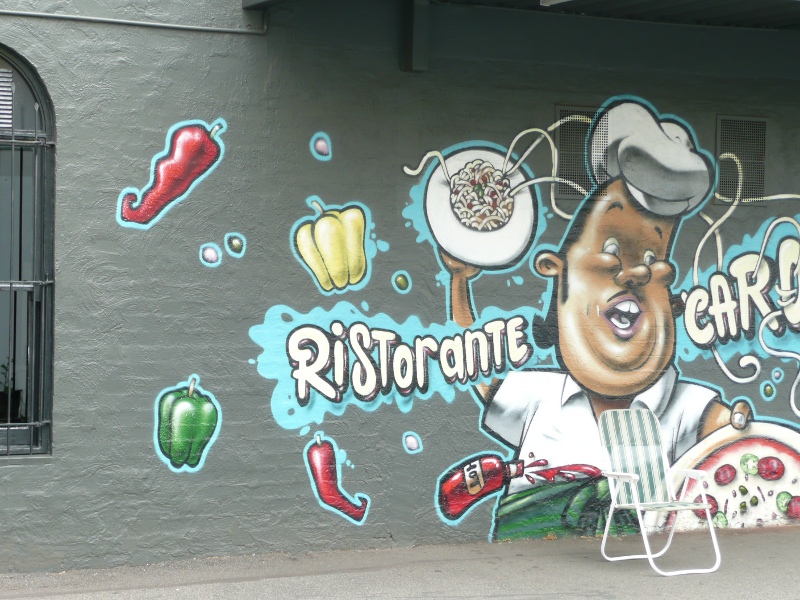
I have taken two images which will allow the chair to be masked out in the final stitch. You can download these images and try it yourself, first.jpg, second.jpg.
In hugin, select Assistant 1. Load images, and then select the images tab and Create control points.
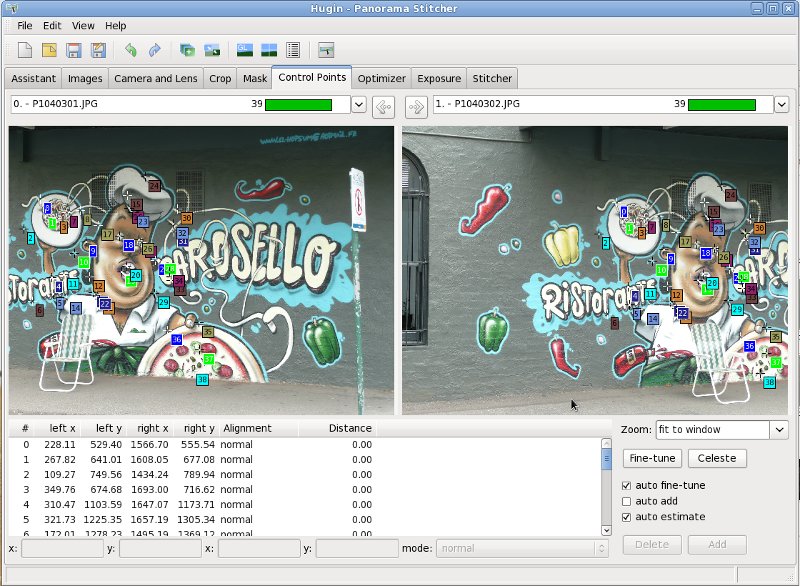
Select the Control points tab and check that all of the automatically generated control points are on the flat surface. Delete any points that are not.
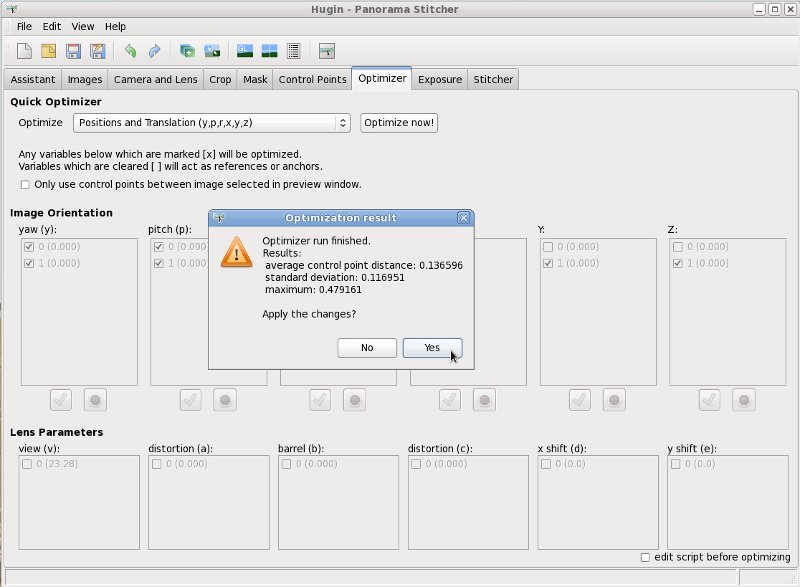
Now select the Optimizer tab and select Positions and Translation (y,p,r,x,y,z), then select Optimize now! and if the error is small, select yes.
You can now select the Fast preview window to see the basic alignment. Select Projection, then select Rectilinear. Move the sliders to adjust the field of view, then select Move/Drag and select Drag mode: Mosaic. Using the mouse you can drag the image into a suitable position in the window by holding down the left mouse key whilst dragging. Dragging with the right mouse button down will rotate the image.
We can now mask out the chair. Select the Mask tab in main hugin window then select image 0 (#0), Add new mask. You can then use the mouse to define a mask boundary using the left mouse button to define points. Double click on the last point to end. (See the tutorial Blend-masks). After defining the mask boundary you can change the mask type if necessary. For this exercise we want Exclude region masks.
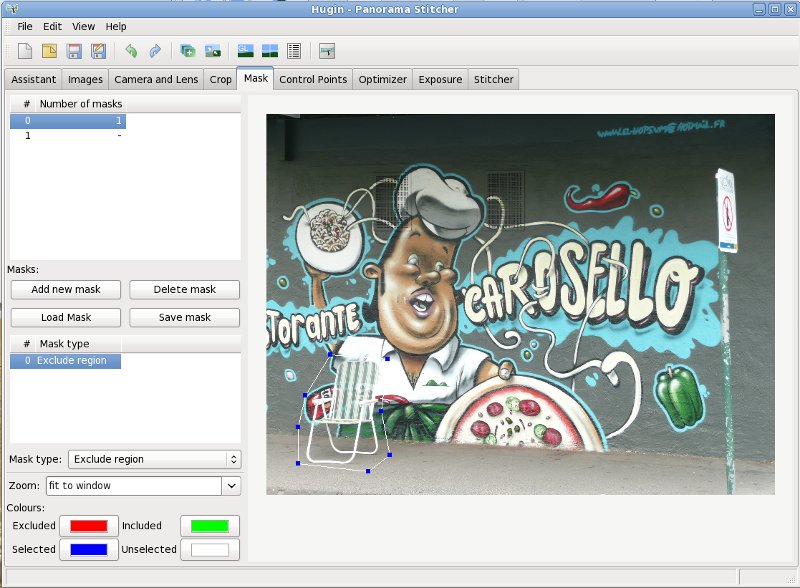
Generate a similar mask for image #1. It isn't necessary to exactly follow the boundary of the chair.
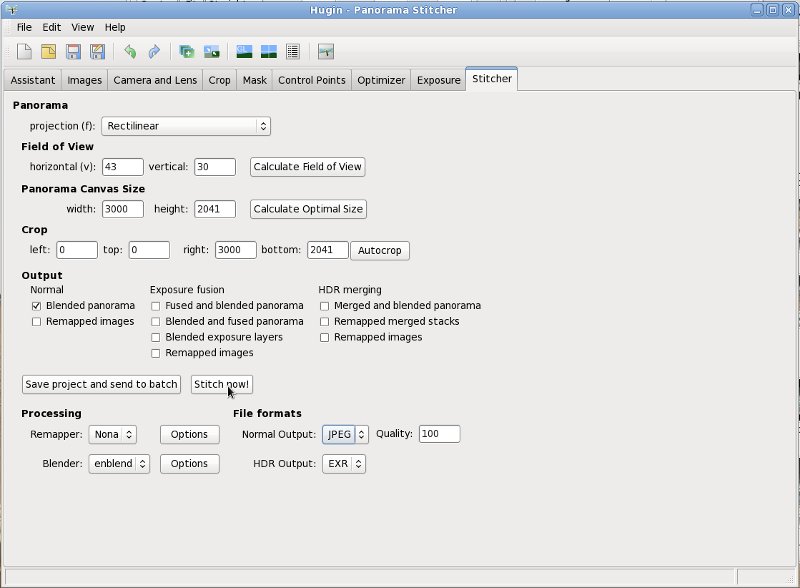
We can now stitch and we should end up with a nice view of the mural without the chair. Go to the Stitcher tab, select your file format (Normal outputs: JPEG or TIFF), and then select Stitch now! and enter a filename for the resulting image in the file browser window that opens.
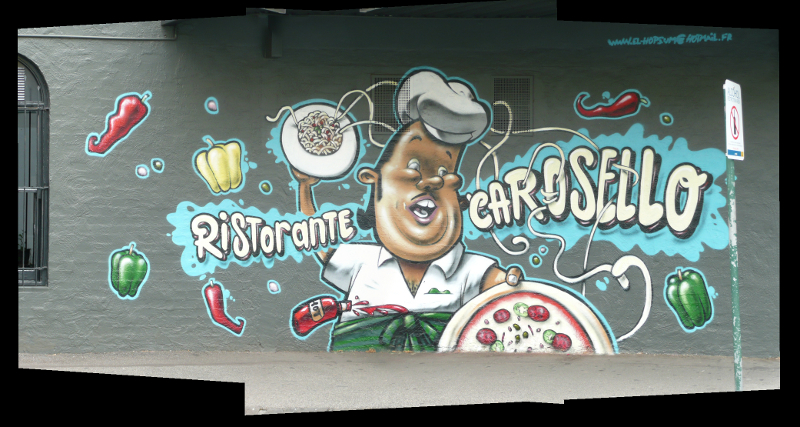
The result is a view without the obstructing chair. It is pity I didn't take another shot that would allowed the street sign to be masked out as well. This is a simple example of how mosaic mode can be used, and should help you get started.
Advanced techniques
If your subject is not a nice flat plane surface, such as the front of a row of terrace houses, or things are not going as smoothly as shown here, have a look at Yuval Levy's tutorial which describes a more difficult subject.
About this mural
This mural is painted on a wall in Hall Street, Moonee Ponds, Victoria.
Author Terry Duell - Created September 2010.