Hugin tutorial — Simple lens calibration
This tutorial describes the application of Hugin to obtain lens parameters a, b, c.
Note 1. Hugin version 2013.0.0 on a Mac has been used for this tutorial. Although your version may differ, the underlying principle should remain the same.
Note 2. Hugin now includes a GUI tool called Calibrate lens GUI that automates the process described below.
The method used here is to set up some straight lines which pass near the edge of the image and across the image near the image center. The lines do not have to be parallel, but they do need to be straight and either have a sharp edge or be fine enough to ensure that points selected on them define a straight line.
'Straight lines' in Hugin are defined by a special kind of control point called a straight line control point.
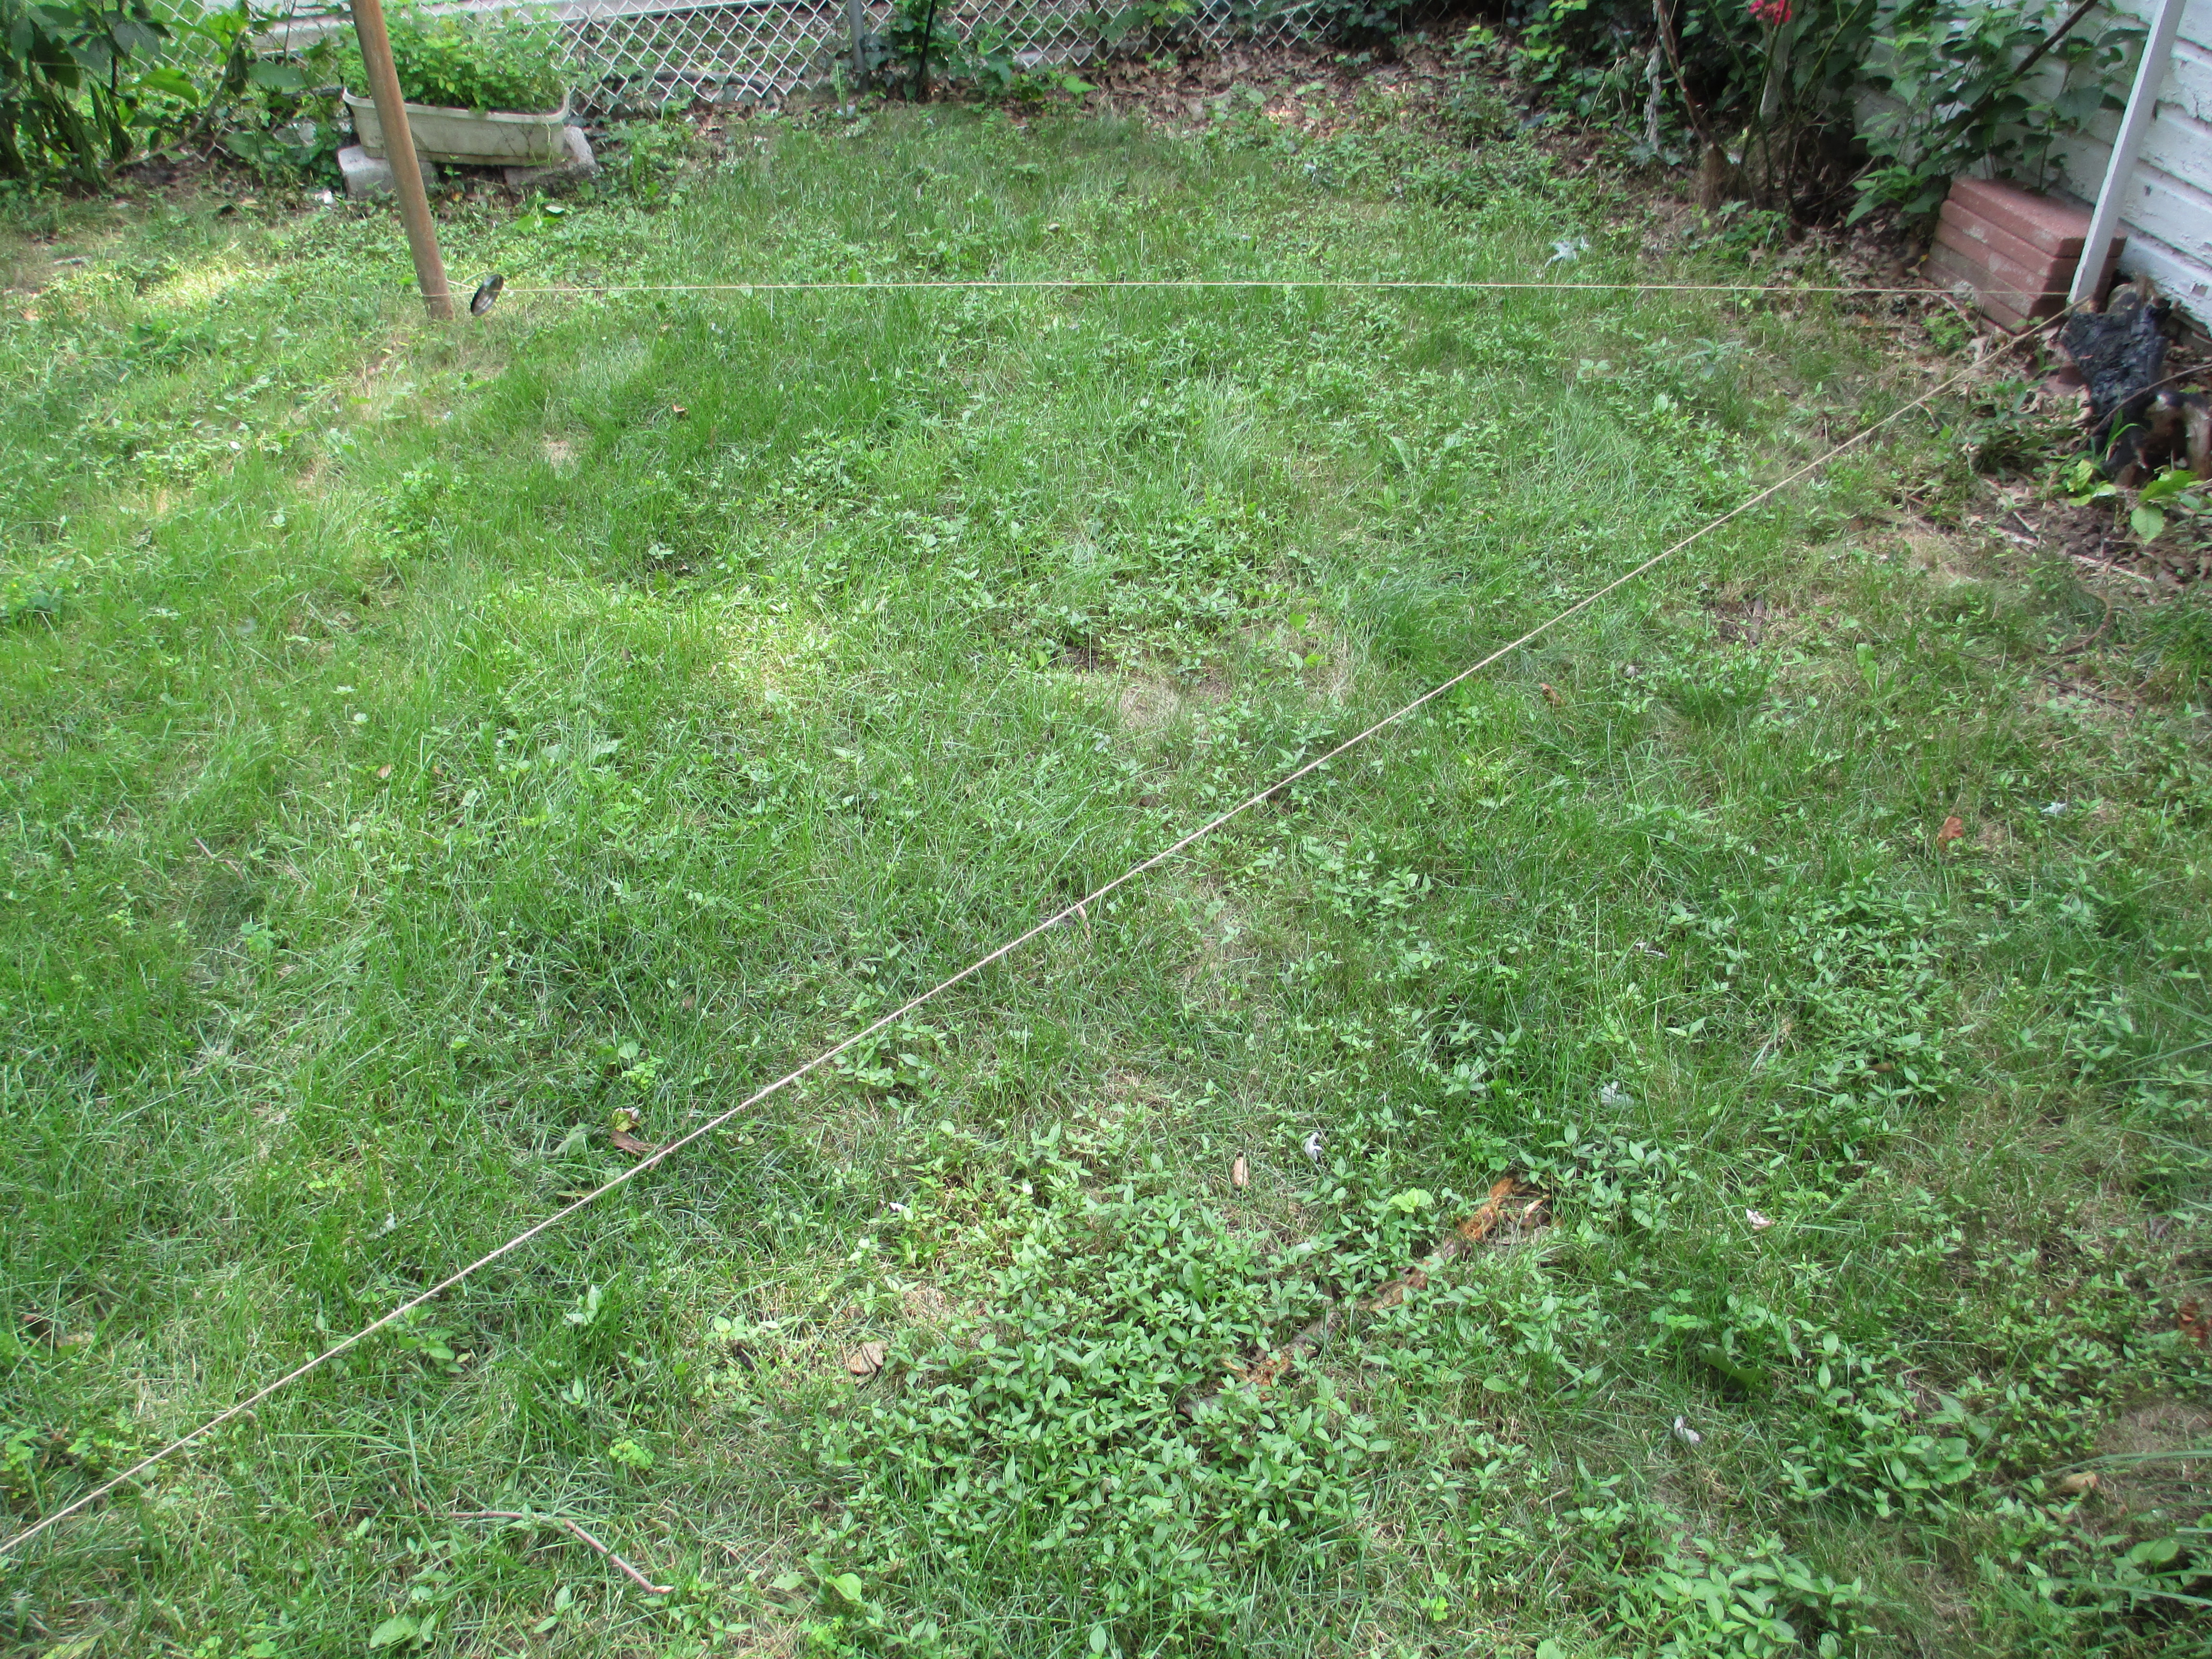
For this example I tied some twine tautly around a few objects in my backyard to create two straight lines, one roughly horizontal at the top and another cutting diagonally across the center of the image.
You can download this image and try it yourself.
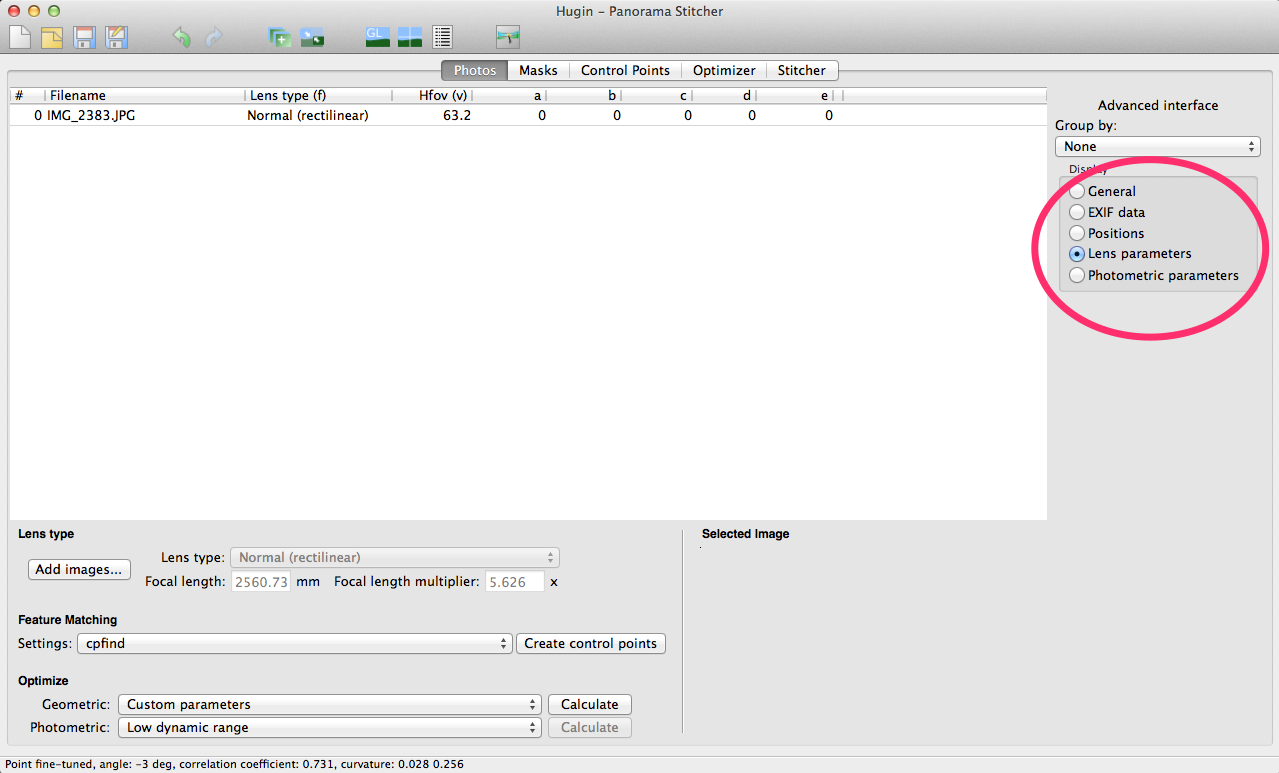
Start by launching Hugin, and select Advanced in the "Interface" menu. Click on the Add images... button at lower left to select the image for the project. Once the image is loaded, note that selecting different radio buttons under Display at right changes the information Hugin displays about your photo. The "Lens parameters" are what we're interested in.
Select Custom parameters from the "Geometric" pop-up menu under "Optimize". This will cause the Optimizer tab to appear at the top. The Radial Distortion parameters should all be zero.
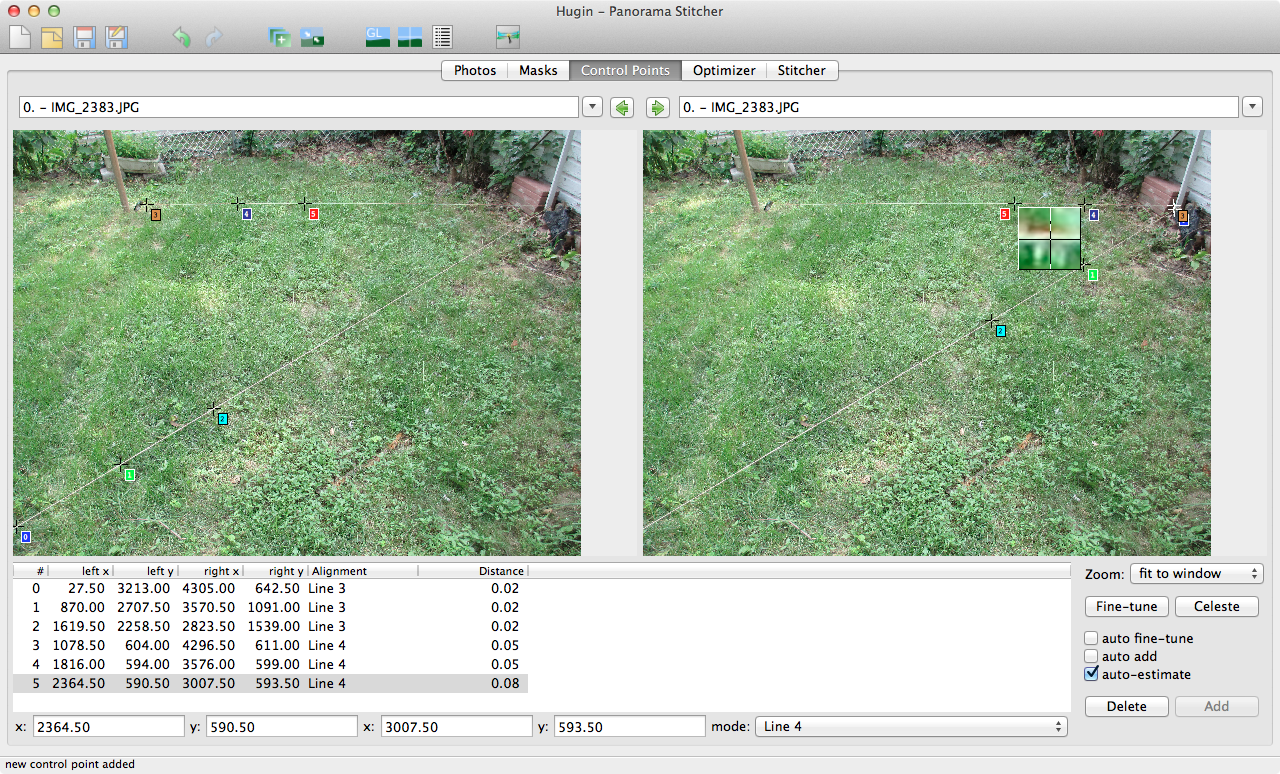
Select the Control Points tab. Your photo should be shown in both image windows. Select your first point near the end of one of the string lines. I began near the left hand end of the string line near the lower edge of the image. Be sure to get your point as close to the centerline of the string as you can. Now choose another "matching" point near the other end of this string line in the second image and click on the "Add" button. It may be necessary to set the zoom to 100% or even higher in order to accurately place the points.
After setting the first point, in the mode pop-up menu at bottom, select add new line. The points you just added should now be called Line 3 under "Alignment".
Add additional point pairs working in from each end of the string line to give reasonably spaced points, each time the alignment should automatically be Line 3, but correct it if not via the mode pop-up. It will likely be necessary to switch the zoom back to "Fit to Window" between points to get a good overall view of the control points.
Add a second set of points along the diagonal string line, again working in from each end. After the first point set, again select add new line from the mode pop-up to ensure that Hugin understands that this set corresponds to a different straight line, called "Line 4".
Select the Stitcher tab and set the "Projection" to Rectilinear.
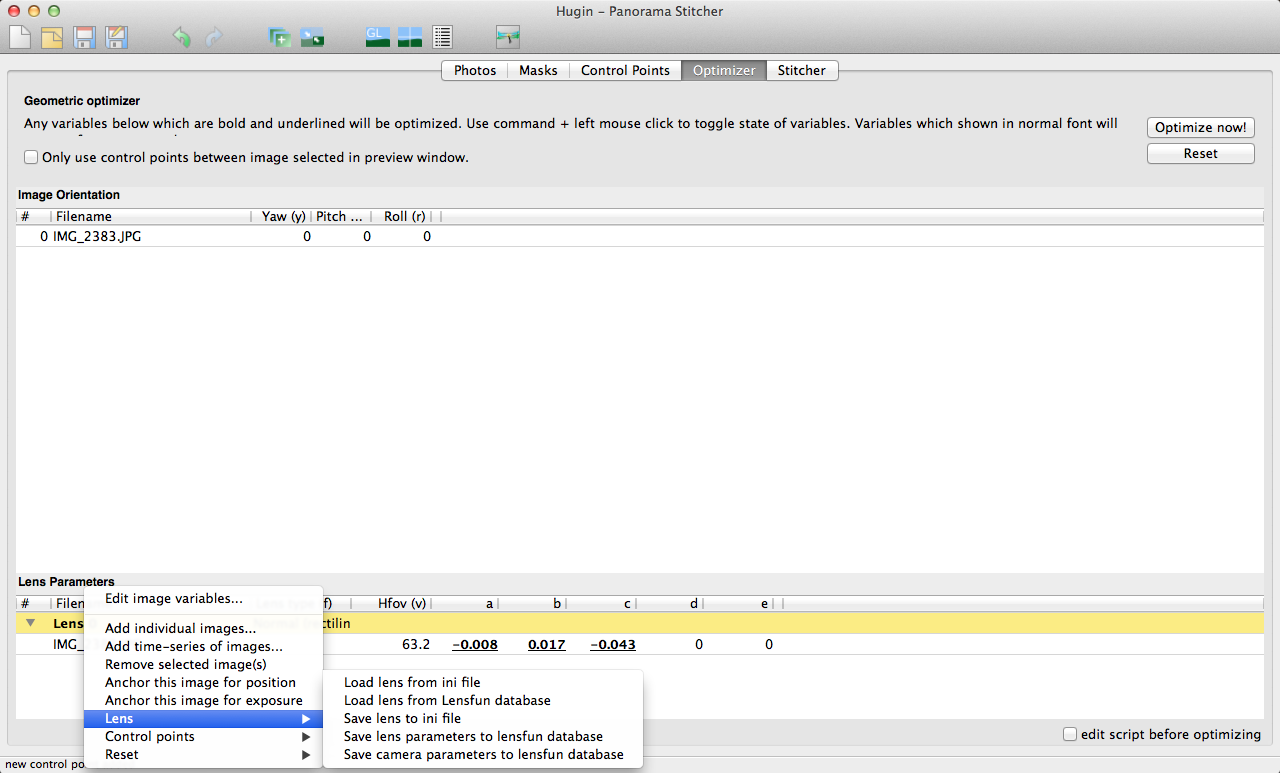
Select the Optimizer tab. At the bottom under "Lens Parameters" click the arrow next to "Lens 0" to show the photo you added. [screen shot] Now command click on the three parameters (which should have values of 0) a, b, and c. The zeroes should now be underlined and in bold text. Click on the "Optimize Now!" button in the upper right and Hugin will pop up a window with the parameters it has calculated. If the results show very small errors, select Yes to apply the changes.
Right-click on the lens parameters and save them for future use.
Further information
It should be necessary to use only two straight lines for this exercise. For extra accuracy add more points to more 'straight lines', but to avoid confusion just add to the project an extra photo of the same scene from a slightly different angle. Put your new 'straight lines' in this photo, when you optimise, both images will be optimised together.
The same technique can be used to optimise fisheye photos, just ensure that the output Projection is always Rectilinear. You will find that the entire fisheye image doesn't fit into a 'rectilinear' output, so just work with half of the photo, Hugin will assume that the distortion is symmetrical.
Other techniques for calibrating a lens include:
- Stitching a normal panorama and optimising Positions, View and Barrel. The advantage of this is that Hugin will calculate lens angle of view (FoV) as well. The disadvantage is that with lots of parameters to optimise, Hugin has less chance to be very accurate correcting lens distortion. (note: to get a really accurate FoV you need a 360° panorama)
- Alternatively, horizontal control and vertical control points can be used to correct perspective and optimise lens parameters at the same time. Again, this technique can also be used to calculate lens FoV, the disadvantage is that you need an object such as a building with exactly perpendicular features for your sample photos.
Tutorial and photos — Terry Duell and John Muccigrosso. Created July 2008 by TD and updated July 2013 by JM.


