
Hugin tutorial — Stitching photos from different lenses
The entire process described here, of taking a mixture of photographs from different lenses or even from different cameras, and stitching them together into a single image, can be performed completely automatically by just clicking Align in the Hugin Assistant tab.
This tutorial looks 'under the hood' of Hugin and introduces some of the concepts and functions that are needed for more advanced use.
Note: This tutorial is based on the 0.8.0 version of Hugin. Although your version may differ, the underlying principle will remain the same.
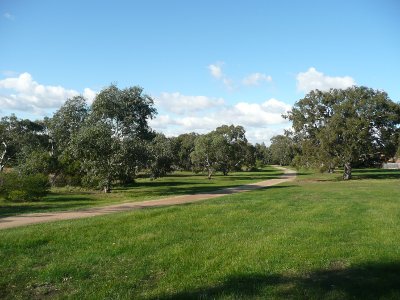
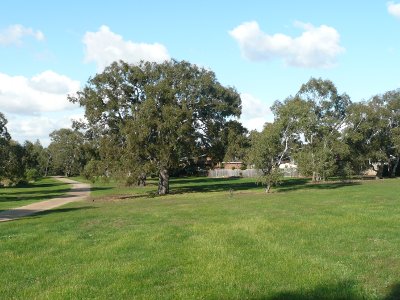
The images used for this tutorial are shown below. The left image was taken with a focal length of 4.6mm and the right image with 7.3mm. The camera has a focal length magnifier (crop factor) of 6.08, hence the 35mm equivalent focal lengths are 28mm and 44mm respectively.
You can download the two photos used in this example (left-small.jpg, right-small.jpg) and try it yourself.
The camera was handheld and there may have been some camera movement which will introduce minor parallax error.
Start by launching Hugin, using the Assistant tab click the 1. Load images ... button and select the images you want to stitch.
Tip: you can select multiple images in the file dialog box or drag and drop files from a suitable file browser.
If your images are JPEG or TIFF format and include suitable EXIF data (saved with the image data by the camera), Hugin will automatically detect the lens focal length that has been used and estimate the horizontal field of view (HFOV). As each image has different lens characteristics it will be assigned a different lens number.
If Hugin doesn't detect EXIF data you will be asked to provide a horizontal field of view (HFOV, degrees) or a focal length (mm) and focal length multiplier for the first image.
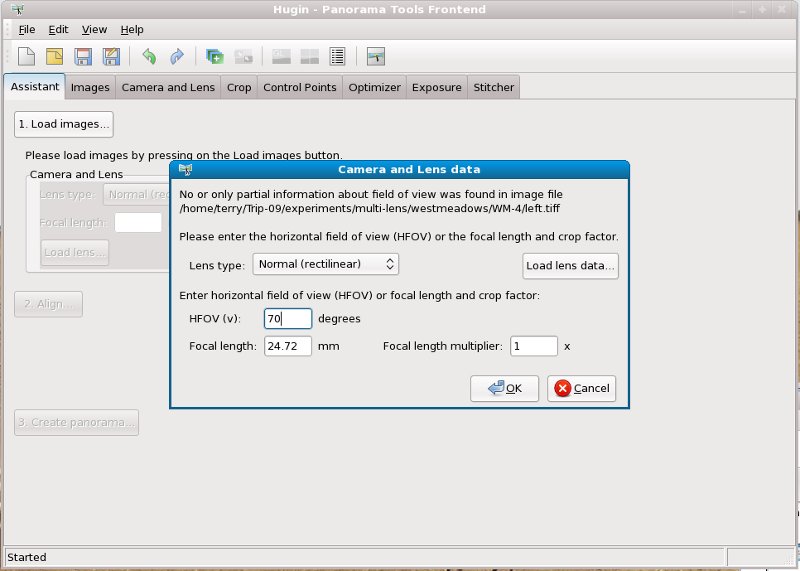
In the above screenshot I am loading a copy of the left image without EXIF data, and I have entered a guessed HFOV of 70 degrees and Hugin has generated the other data. Hugin automatically computes a focal length assuming a focal length multiplier of 1.0.
If you don't know what value to use, just use an estimate. As a guide, the 'normal' lens for a 35mm camera has a focal length of approximately 50mm and a HFOV of about 40 degrees. A 28mm wide angle has a HFOV of approximately 64 degrees.
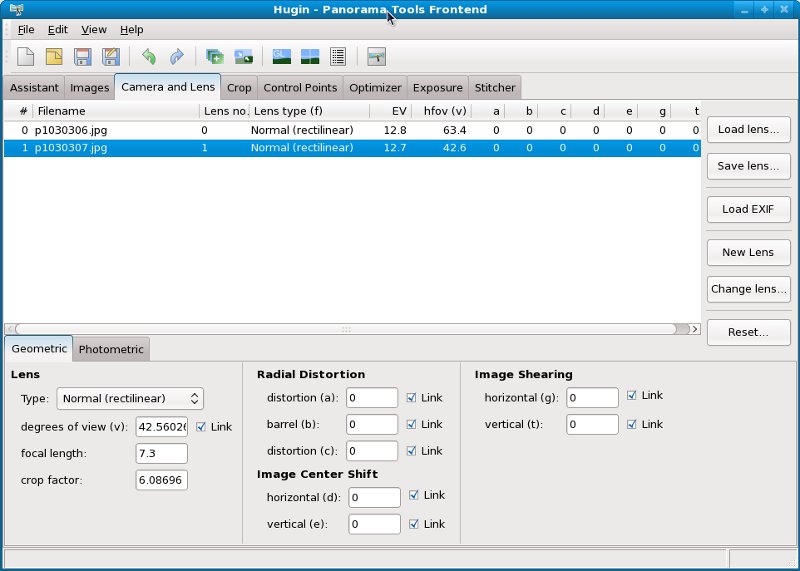
The second image can then be loaded and will have the same lens data applied. Now open the Camera and Lens tab, select the second image and then select New Lens so that Hugin knows that the lenses are different and will have different parameters.
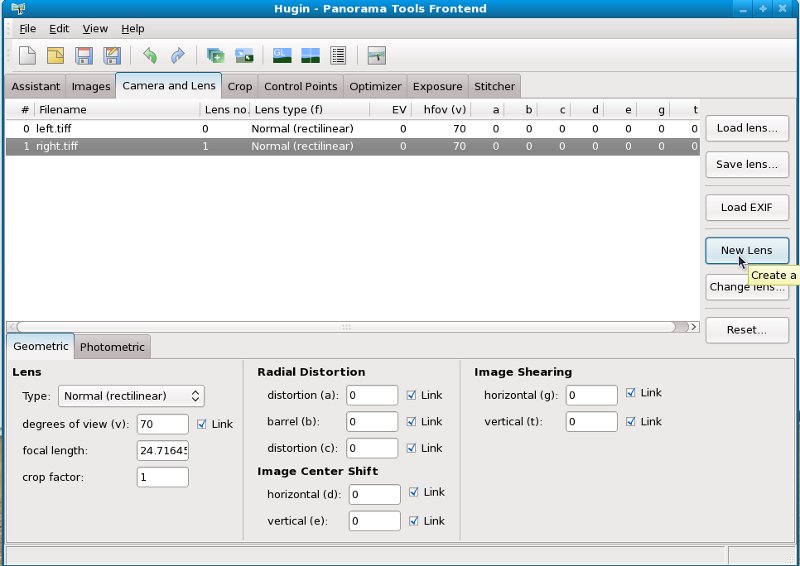
At this point Hugin has assigned an HFOV of 70 degrees to each image. The lens parameters can be ignored for now as the Optimiser should find the correct HFOV for the images. We know from the EXIF data that the expected HFOVs should be somewhere near 63.4 and 42.6 degrees, so we can see later how good the optimiser is at finding the the correct values.
If you are using JPEG images and have the EXIF data you can now go to the Optimizer, Exposure and Stitcher tabs to select suitable settings. We will look in detail at how to handle the case of no EXIF data and guessed HFOV values a bit later.
Set the optimiser to Positions, View and Barrel.
Click the 2. Align... button. Control points will be automatically detected and the selected optimisations carried out. When complete the Fast Panorama preview window will open and display a preview of the stitched images.
Here we see two views of the Fast Panorama preview window with each of the images being displayed separately. Images can be 'switched on' and 'switched off' in the preview window by clicking on the '0' and '1' image number buttons at the top.
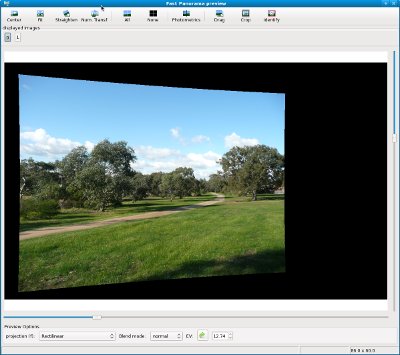
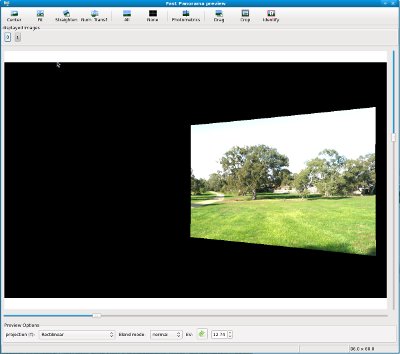
Note how Hugin has adjusted the size of the images to compensate for the different focal lengths used.
Use the Fast Panorama preview window to adjust the final stitched image, by adjusting the field of view (horizontal and vertical sliders), set a different projection, carry out full photometric correction, and crop the final stitched image to suit your taste.
You can now click the 3. Create panorama... button and save the stitched panorama.
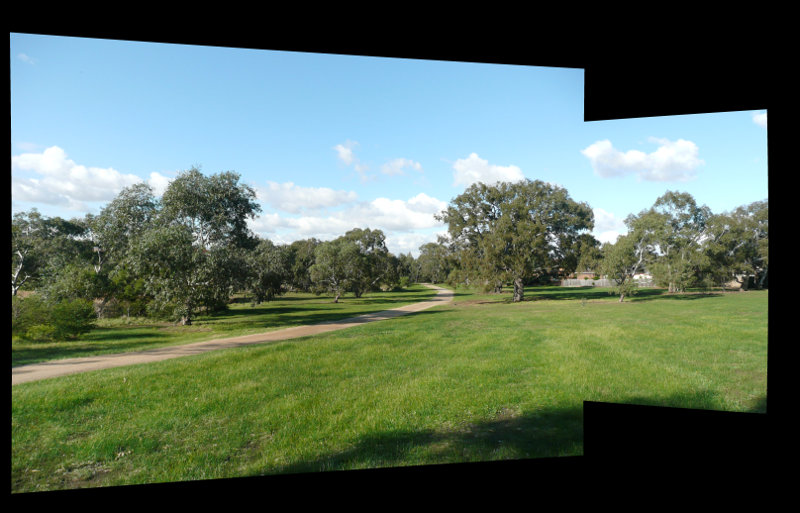
This is the the result using images with EXIF data and only the basic steps in Hugin's automated Assistant
Now back to the case of photos with incomplete EXIF data.
We have loaded the images, set the HFOV to a guessed value of 70 degrees and set the lens number of the second (right) image to #1.
Go to the Optimizer tab and select Positions and View (y,p,r,v), then click 2...Align.
This may give a reasonable result, and for this example case the HFOVs are still 70 degrees for each image.
Go to the Camera and Lens tab, select each image in turn and select Reset for all parameters.
Go to the Optimizer tab, select the Custom parameters below, then select the Lens Parameters: then tick view (v): for each lens, then select Optimize Now!, and apply changes.
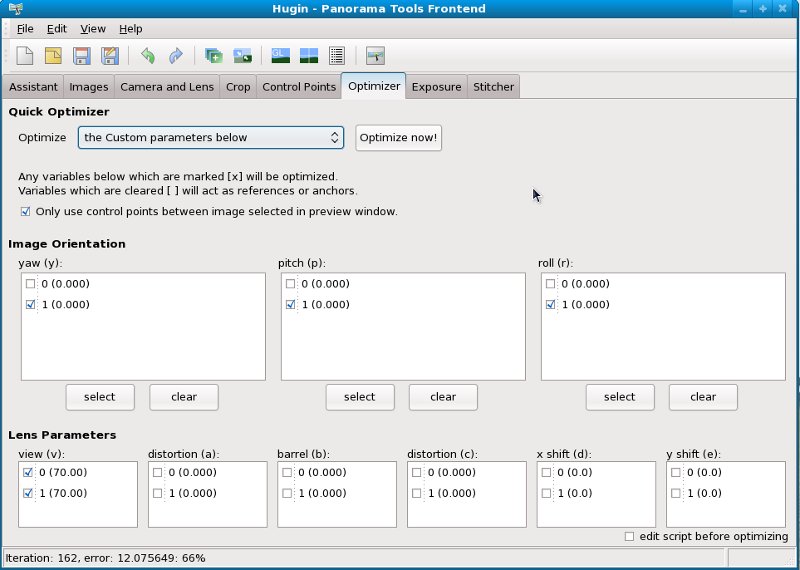
The Camera and Lens tab shows that the optimiser has arrived at HFOV values of 59.3 and 42.1 degrees.
The Fast Panorama preview window shows the panorama a bit offset which can be corrected by selecting the Center icon top left of the Fast Panorama preview window.
You can now click the 3. Create panorama... button and save the stitched panorama.
Here is the resulting panorama using images without EXIF data and guessing initial HFOV values.

A final point that may be of help. If you need to create control points manually in the Control Points tab, uncheck auto fine-tune and auto-estimate. These features don't currently work too well with images of different scales.
The example images were taken in Westmeadows, Victoria, Australia.
Tutorial prepared by Terry Duell July 2009