Chromatic aberration
Intro
Color fringes can be very annoying, especially in stitched panoramas. Since they often appear nearer to the edges of single images they are near to any seam between two images in the panorama. Even worse, they change color where they cross the seam.
Hence chromatic aberration should be corrected if visible otherwise, at least for full screen or printed panoramas where you allow to zoom in to the native camera resolution. While correction is relatively easy CA can not be automatically determined like f.e. barrel distortion. Only visual judgement can give you enough control of the result. Unfortunately it needs some experience to do this.
What it is
Chromatic aberration is a common lens error visible in images as colored fringes or colored blur along edges. It is caused by a different refractive index of glass for light at different wavelength. There is a nice description with lots of links on wikipedia:Chromatic aberration[*].
Another good description is found on Paul van Walree's page.
LCA
Different refractive index means different Focal Length for a single lens. This would lead to different focal planes for different colors. You would have to focus differently for red, blue or green. This effect is called longitudinal chromatic aberration (LCA). If you have a fringe near the image center that changes color if you defocus slightly, this is most likely longitudinal chromatic aberration. This type:
- can not be corrected by software
- gets less if stopped down
- is dependent from focus distance.
TCA
When a lens is corrected for longitudinal chromatic aberration, different colors focus more or less in the same point on the optical axis, but they might focus in different distances off axis resulting in images of different size for different colors. This type is called lateral or transverse chromatic aberration (TCA). If you have complementary colored fringes progressively more from the center to the corners, this is most likely transverse chromatic aberration (although there are some exceptions as the example below illustrates). This type:
- can be corrected by software
- does not change by stopping down (stopping down would perhaps make the fringes sharper and lead to the impression TCA is reduced)
- is dependent from focus distance.
What it is not
Digital photography introduced some new types of color fringes, that are not lens chromatic aberration. They are frequently confused with TCA and unfortunately they occur often mixed with TCA. These effects might be visible as purple or blue fringes and are visible around overexposed areas in most cases.
They might have different causes:
- By sensor overflow visible as blooming. This blooming often has a purple color because of the bayer pattern of the sensor: If a sensor cell overflows to the neighboring cells all cells are affected the same. There are 50% green but only 25% red and 25% blue sensor cells. Hence blue and red are weighted more resulting in purple fringes around overexposed areas. Since CMOS sensors are not prone to overflow this affects only CCD sensors.
- By chromatic aberration and other errors in the micro lenses that are in front of the sensor.
- By reflections between the sensor and the protective glass (that might be coated and hence reflects colored).
- By interpolation errors or anti moire filters.
- By partial color saturation: Blue sky f.e. might be clipped to pure white because all color channels are saturated. If there is a blurred dark object in the image the sensors in the blur region receive only part of the light and hence don't saturate. The blur region appears blue. This is the only effect that applies to analog film as well.
How to avoid
LCA can be avoided if shot stopped down. Purple or blue fringes might benefit from stopping down, too. They can be avoided in most cases if you expose for the highlights (i.e. don't overexpose). TCA can only not be avoided if you can use a better lens. Fixed Focal Length lenses are less prone to TCA than cheap zoom lenses. Converters are often very bad. You can avoid TCA while stitching if you don't use the corners where it is most prominent.
How to distinguish
If you want to correct color fringes by software you need to know which type they are. If all of the following points are met your image most likely contains true TCA:
- Corners should show most color fringes whereas the center should show none.
- Color fringes should be not only at the edges of overexposed areas but at lower contrast edges, too.
- Color fringes should be of complementary color (red-cyan, blue-yellow or purple-green) on opposite sides of a dark or bright area.
- Color fringes should be in all corners the same direction pointing out from the center.
Difficulties to view
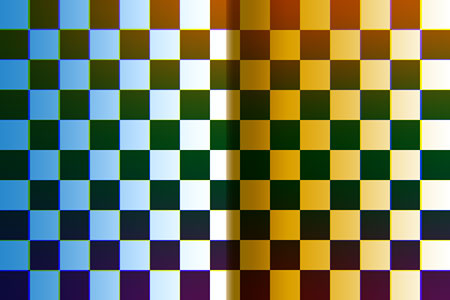
If you want to test your lens for CA the subject you shoot is critical. The visibility of TCA highly depends on the colors forming contrast edges. Here two artificial examples to illustrate this. In both images TCA was introduced by sizing one channel to 101%. In the upper image this was the red channel causing red-cyan fringes in the lower image sizing the blue channel to 101% caused blue-yellow fringes.
Please have a close look at the half with the azure background in both images. The cyan fringes in the upper image are not visible at all with dark green foreground, the red fringes turn into an almost invisible dark brown.
In the lower image both blue and yellow fringes are invisible on the more saturated yellow background. Where it turns to a lighter shade of yellow the blue fringes appear purple. The yellow fringes are green on the azure background.
This shows that the best subject for CA determination is composed of neutral greys, black and not overexposed white. The following example is a quite good one - not overexposed, grey sky and no saturated colors.
Example with true TCA
This image is reduced to 30% but still shows heavy TCA as a result of the usage of a cheap wide angle converter:
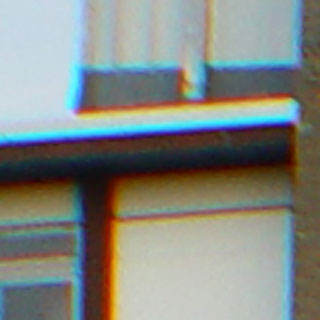
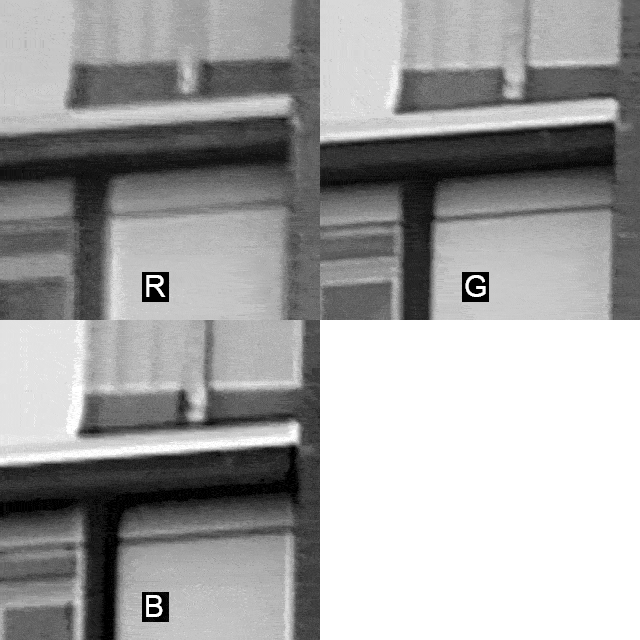
Here a crop of the upper left corner, enlarged to 200%. To verify this is true TCA you can simply cycle through the color channels (f.e. by pressing Ctrl+1, Ctrl+2 and Ctrl+3 in Photoshop[*]). If the whole image content in areas with more or less neutral colors seems to move this is true TCA:
switch on GIF animation to see the different channels in the right image
The whole image content seems to move if channels change. This is clearly due to TCA. As you can see, the channels have different sharpness. This is most likely due to longitudinal CA.
For comparison a similar sized and enlarged crop from the center:
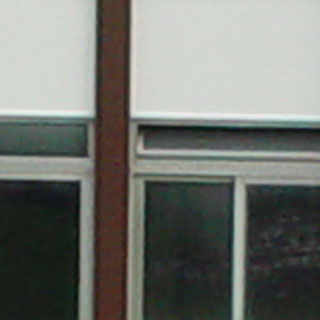
There are no color fringes in the center. A good indicator of true TCA.
You can try to correct TCA by hand in one corner in Photoshop[*] to see whether it is worth the effort to correct it in total:
- crop to a corner with visible TCA
- enlarge by 200% to 400%
- flatten image if needed.
- try to nudge the red and the blue channel in order to minimze fringes. To do this, in the channels palette:
- Click the red channel to make it the active one.
- Click the small eye symbol of the RGB channel in order to make all colors visible
- Choose the move tool from the tools palette
- Nudge the red channel with the arrow keys until the fringes are blue-yellow
- repeat the same for the blue channel and nudge to optimum
- repeat for the red channel if there are still red-green fringes
Here is the above example after using this technique.
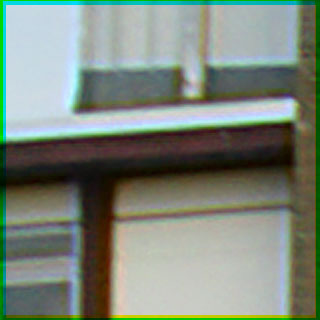
The remaining light blue fringes can not be corrected. They are most likely not lens TCA but an effect as described under What it is not.
Example with no TCA but purple fringes
This image is reduced to 40%. It shows purple fringes but no chromatic aberration:

Here the enlargement of the upper left corner and the moving channels:
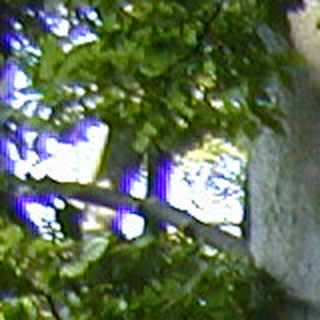
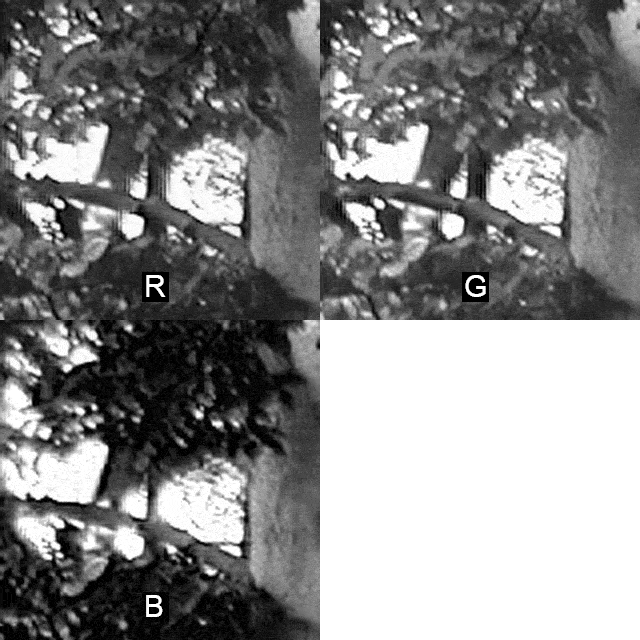
(switch on GIF animation to see the different channels in the right image)
As you can notice, the details on the grey tree don't move at all. It's only the left (outside) side of the overexposed sky areas that changes.
Strange Example
This crop (lower left corner) is from a frequently used combo: Nikon D70 with Nikkor 10.5mm full frame fisheye (image (c) Andrey Ilyin). At the first glance this looks like normal red-cyan TCA. But if you try to correct this one, it will drive you nuts. Have a close look on the moving channels:
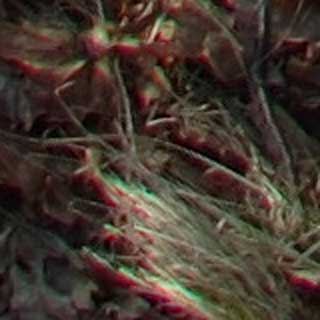
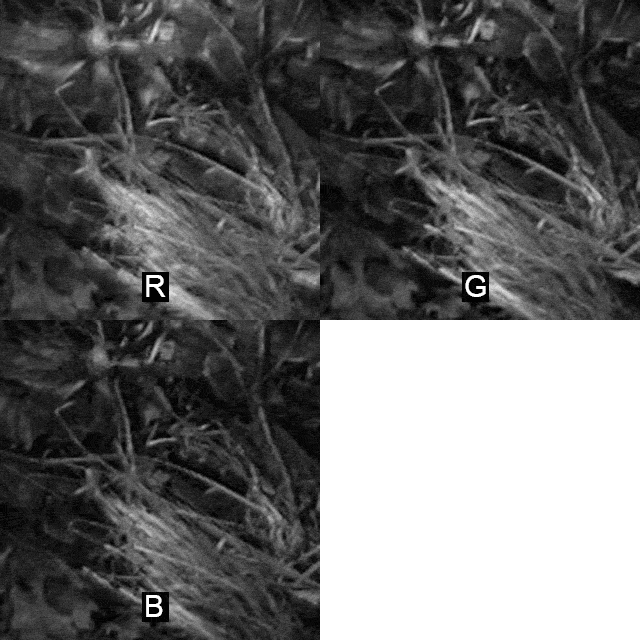
(switch on GIF animation to see the different channels in the right image)
As you can see part of the image details move but part doesn't (the blade of grass in the center). If you minimize the fringes there will be new fringes or even double details with different color:
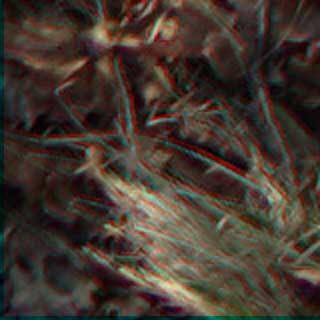
This weird kind of colored fringes is definitely not lens CA. I can only think of some effects of bayer interpolation, but this is wild guess.
How to correct
In many cases it would be enough to adjust the size of the color channels to correct for TCA. However, correction might not always be satisfactory even if it is of the true tCA type. This might have different causes:
- There might be a rest of LCA in the image. In this cases one or two color channels can be blurred. This is partly the case in the Example with true TCA. You can try to selectively sharpen[*] the questionable channels. Since unsharp masking works best on gaussian blur but CA blur is more of the radial blur type this probably won't work very good.
- Images where JPEG compressed (too much). If you shift the color channels of previously jpeg compressed images you emphasize the jpeg artifacts. It is a better idea to work on TIFF images converted directly from RAW or scanned directly.
- Adjustment is too coarse. Depending on the resolution of the image sub-pixel alignment might be necessary.
Easy
The most convenient way to correct TCA is to use a tool like the Adobe Raw Converter, Picture Window Pro or PTLens[*] offer. You zoom into a corner with good details and use a pair of sliders to adjust the image size for the red channel (red-cyan fringes) and the blue channel (blue-yellow fringes - the purple-green type is a mixture of red-cyan and blue-yellow type). Both ways allow for sub-pixel adjustment.
This technique (including sub pixel adjustment) can be peformed by hand with any image editor that can make size adjustments to single channels. If the step size is too large, the image can be upsampled prior to correction.
However, if you use one of those easy approaches look closely at different areas of the image - especially different distances from the image center. It could well be that correction in one area causes fringes in another one. If this is the case TCA in this image doesn't follow an easy linear scheme and hence can't be corrected this way - see next paragraph.
Precise
Panorama tools Radial Shift[*] filter allows for separate correction of red, green and blue channel using a third degree polinomial. This kind of curve should be complex enough to correct for any kind of non-linear TCA.
Unfortunately it was very difficult to estimate the correct values until 2004 when Jim Watters and Erik Krause found a way to determine suitable correction coefficients using different calculation approaches.
Based on this work Eric Gerds developed a Photoshop CS Javascript called PTShift[*] that allows for manual correction in different areas and passes the found deviations as virtual control points to PTOptimizer in order to calculate correction coefficients.
Alternatively the correction coefficients can be calculated entirely with hugin and PTOptimizer, for more details see this hugin tutorial on correcting TCA. For more precise results, octave (script on the hugin page: [1]) can be used to calculate the coefficients rather than PTOptimizer. An alternative to the Radial Shift[*] filter is fulla which can also correct TCA, barrel distortion and vignetting at the same time.
Erik Krause[*] 17:18, 2 May 2005 (EDT)
External links
- Wikipedia:Chromatic aberration[*]
- dpreview on chromatic aberration
- Michel Thoby's article Illusion and reality - How does TCA look like?

